Shopping for handicap grab bars Redmond homeowners can actually rely on gets confusing fast. There are dozens of styles, finishes, lengths, and weight ratings out there, and most product pages do a bad job explaining what matters. Picking the wrong bar can mean something that looks good but doesn’t hold up, or a bar that works fine but sticks out like a sore thumb in your bathroom.
Let’s break down what actually matters when you’re choosing.
Start with Weight Rating
The first spec to check is the weight rating. Bars sold for grab-bar use should be rated to hold at least 250 pounds of pull force when installed correctly. ADA-compliant bars are rated for 250 pounds minimum, and heavy-duty bars go up to 500 pounds.
Go with the higher rating when you can. A bar that feels rock-solid under stress builds confidence, and confidence means the person actually uses it instead of skipping it.
Check for ADA Compliance
ADA-compliant bars have specific diameter (1.25 to 1.5 inches), clearance from the wall (1.5 inches), and smooth surface requirements. These specs aren’t just for public buildings. They’re the result of a lot of testing on what actually works for hands under stress.
Pick the Right Length
Length matters more than people think. A bar that’s too short doesn’t give you enough grip options, and one that’s too long wastes wall space and money.
Common Lengths
- 12 inches: Good for tight spaces near toilets or sinks
- 18 inches: The most common all-purpose length
- 24 inches: Better for showers and longer reaches
- 36 inches and up: For wheelchair transfers or full-length bathtub support
For most homes, 18-inch and 24-inch bars cover the majority of placements.
Choose the Right Shape
Different shapes solve different problems. Getting this right makes the bar feel natural instead of awkward.
Straight Bars
The standard option. Works for almost every situation and costs the least. Install them horizontally, vertically, or at a slight angle depending on the spot.
Angled Bars
L-shaped or Z-shaped bars combine horizontal and vertical support in one piece. These are great next to toilets or shower seats where you need help both sitting down and standing up.
Fold-Up Bars
These flip up against the wall when not in use. Good for toilets that aren’t against a side wall, or for bathrooms that also need to function for guests who don’t want to see grab bars everywhere.
Floor-to-Ceiling Poles
Tension-mounted or bolted poles that run from floor to ceiling work well next to beds or in the middle of a bathroom where no walls are nearby. Make sure any pole you buy is bolted, not just tension-fit, for real support.
Material & Finish Matters
The material affects both grip and how the bar looks in your bathroom.
Stainless Steel
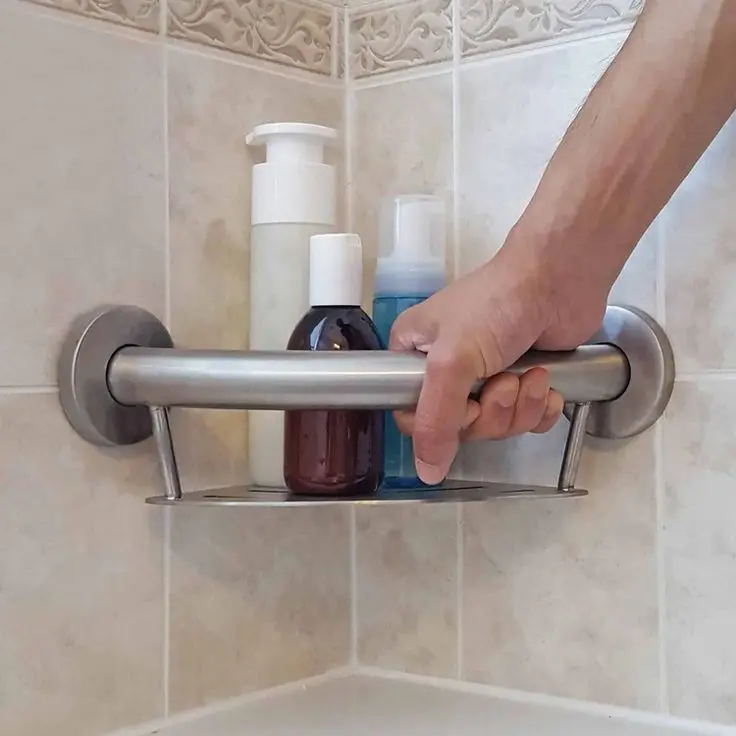
The workhorse. Doesn’t rust, easy to clean, and comes in brushed or polished finishes. Most handicap grab bars Redmond bathrooms use are stainless for good reason.
Plastic-Coated or Nylon
Warmer to the touch than metal, which matters in cold bathrooms. The textured surface gives better grip for hands that tend to slip.
Designer Finishes
Oil-rubbed bronze, matte black, and brushed nickel bars cost more but blend into modern bathrooms without looking medical. If someone in the house resists the idea of grab bars because they look institutional, a designer finish changes that reaction completely.
Grip Surface
Smooth bars are easier to clean. Textured or knurled bars give better grip when hands are wet or soapy. Most manufacturers offer both surface types on the same bar shape.
For anyone with arthritis, weak hands, or nerve issues in the fingers, textured is almost always the better choice. The grip takes less squeezing force to feel secure.
Mounting Considerations
Different bars need different mounting hardware, and not all wall types work with every style.
Standard Flange Mount
The typical three-hole flange at each end. Needs to hit studs, blocking, or heavy-duty anchors. Screws should be stainless steel to avoid rust.
Concealed Mount
Fancy-looking bars with no visible screws. These hide hardware behind snap-off covers. They cost more and sometimes make it harder to check if mounting is still tight years later.
Tile Wall Installs
If your bathroom has tile, make sure the bar comes with (or is compatible with) anchors rated for tile. Regular drywall anchors will crack tile over time.
Matching Bars to the User
The right bar depends on who’s using it.
For Wheelchair Users
Look for heavy-duty bars rated for 500 pounds, mounted lower than standard (around 32 to 34 inches). Transfer bars behind toilets and in showers should be at least 24 inches long to give enough pull surface.
For Seniors Walking Independently
Standard 18-inch or 24-inch bars at 33 to 36 inches high work for most situations. Focus on high-traffic spots first (shower entry, shower interior, toilet side).
For People with Balance Issues
Angled bars work better than straight ones for people whose balance can shift quickly. The multiple grip angles give options when the first grip doesn’t feel stable.
Budget Realistically
Basic stainless bars run $20 to $40 each. Designer or heavy-duty bars run $60 to $150. Add installation labor on top. Buying the cheapest bar you can find is a mistake because the five-dollar difference between a bad bar and a solid one is nothing compared to what a fall costs.
Good bars last decades with zero maintenance. Pay once, use forever.